Peanut butter tasting (!!!)
I recently re-read Gwern On Having Enough Socks and, uh, now I’m hosting a blind-tasting of a dozen peanut butters this Saturday, November 22 in Amsterdam. If you’re in town, email me for the event details. Together we will find the best 100% pindakaas met stukjes.
A shoe tower
The weather has turned chilly, and my girlfriend is highly encouraging me to build some bedroom storage so our coats and sweaters are more accessible.
Since making a standard box wardrobe out of plywood would be more expensive and time consuming yet aesthetically indistinguishable from Ikea, I decided to explore a lightweight frame using the hardwood dowels left over from my floating castle desk.
In particular, I wanted to cut a groove in the dowels to hold (and hide) the raw edge of thin plywood shelves.
I 3D-printed a custom shoe for my lil’ trim router:
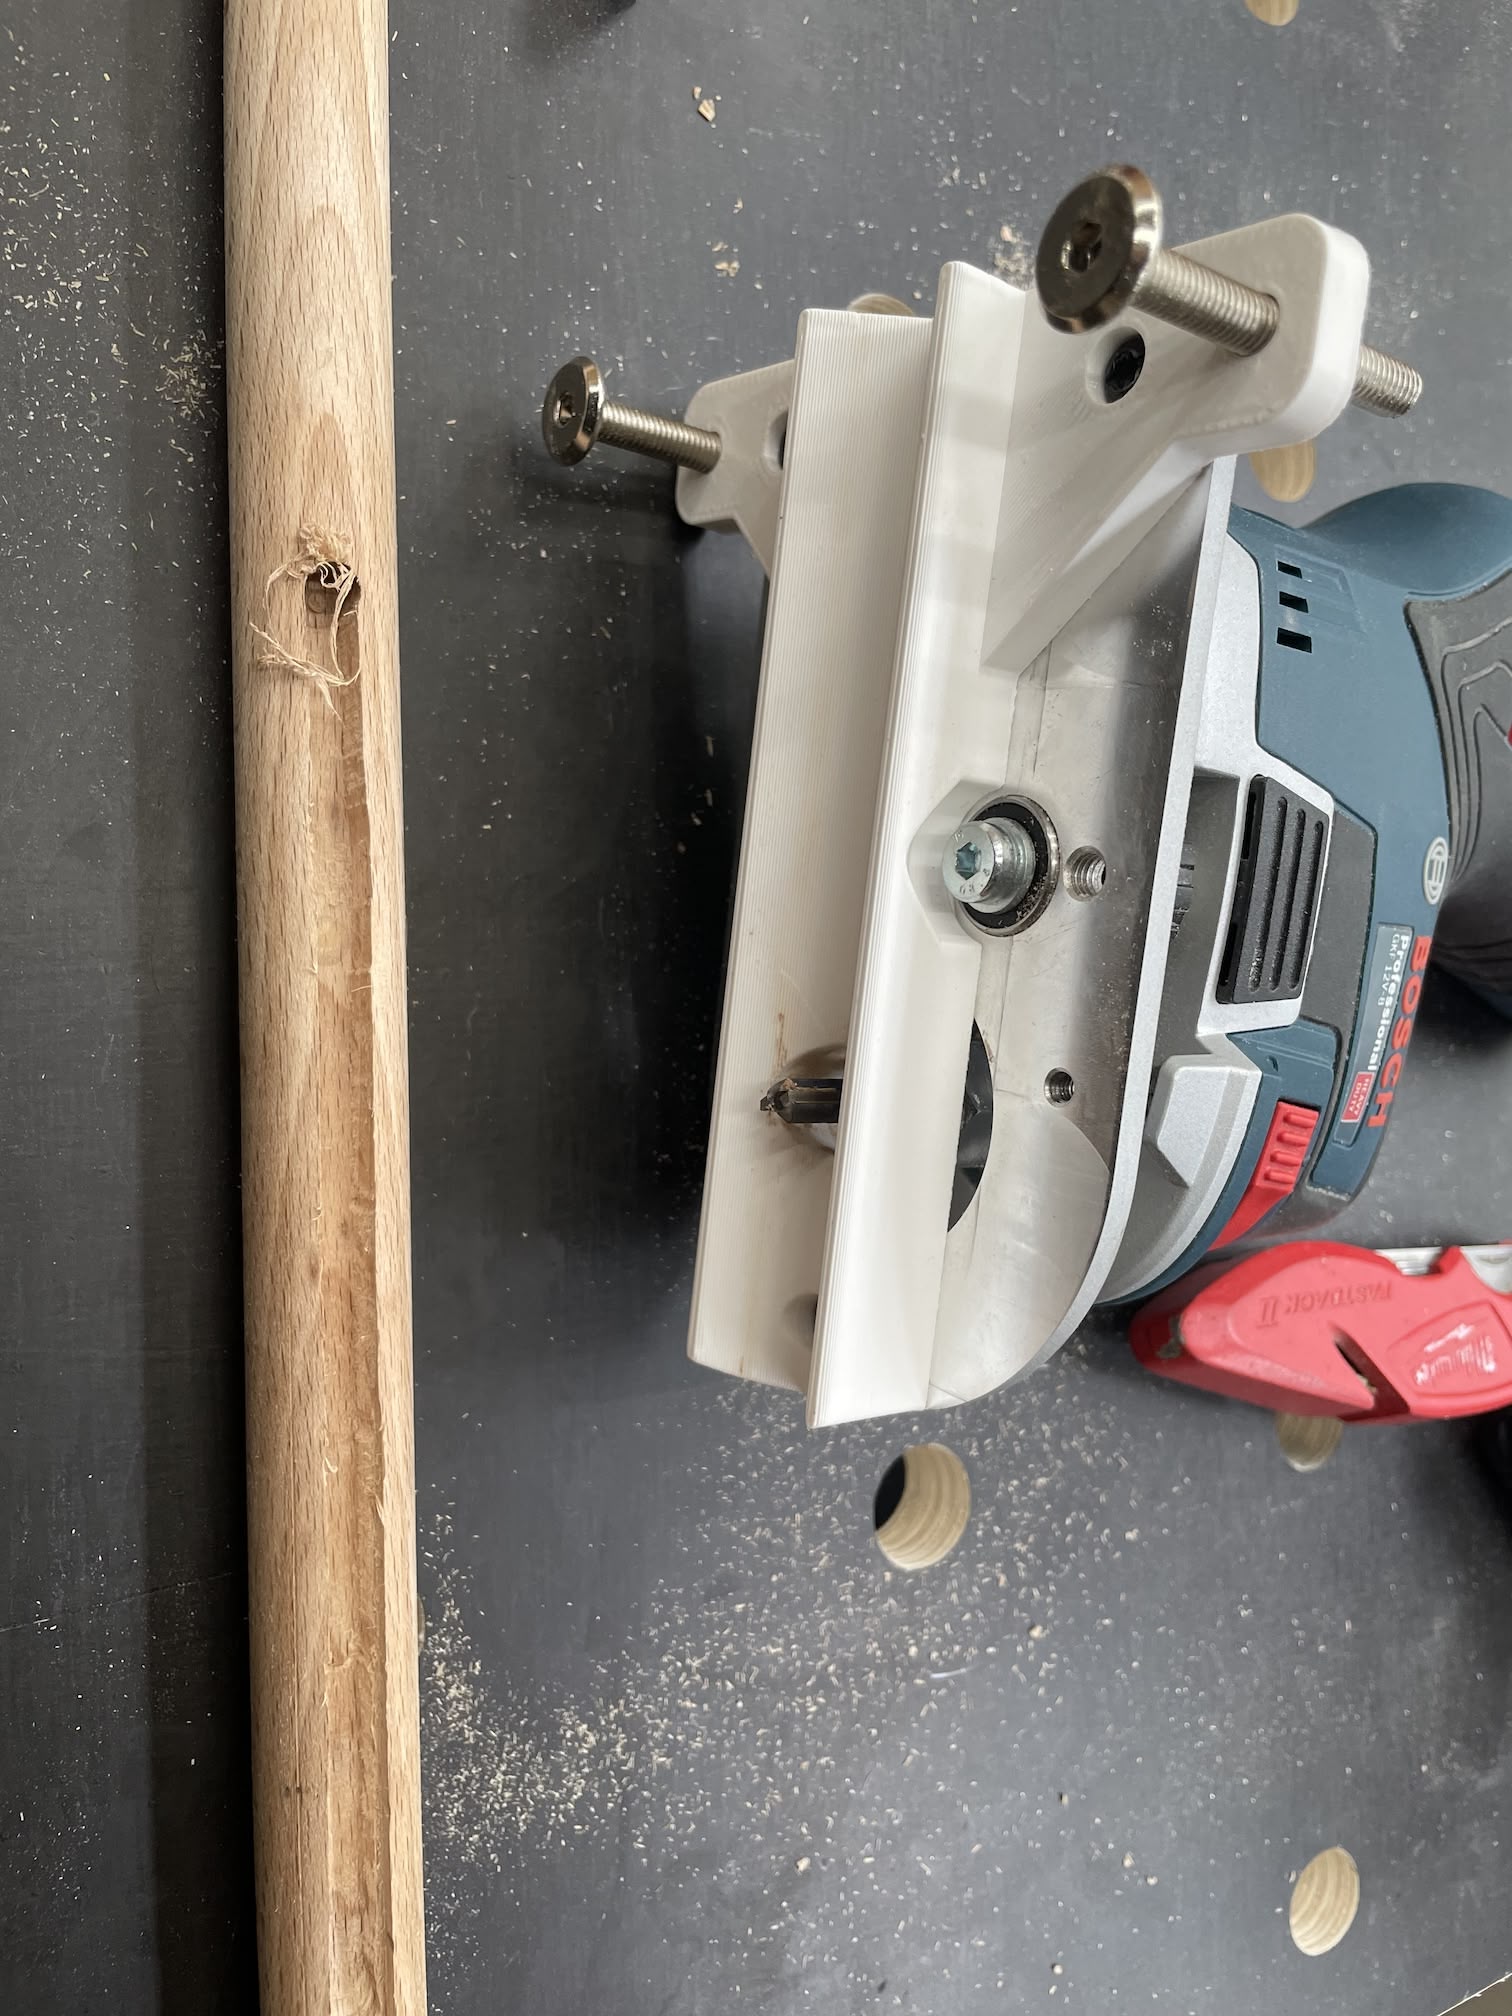
but this yielded poor results, so I ended up buying a full-sized plunge router.
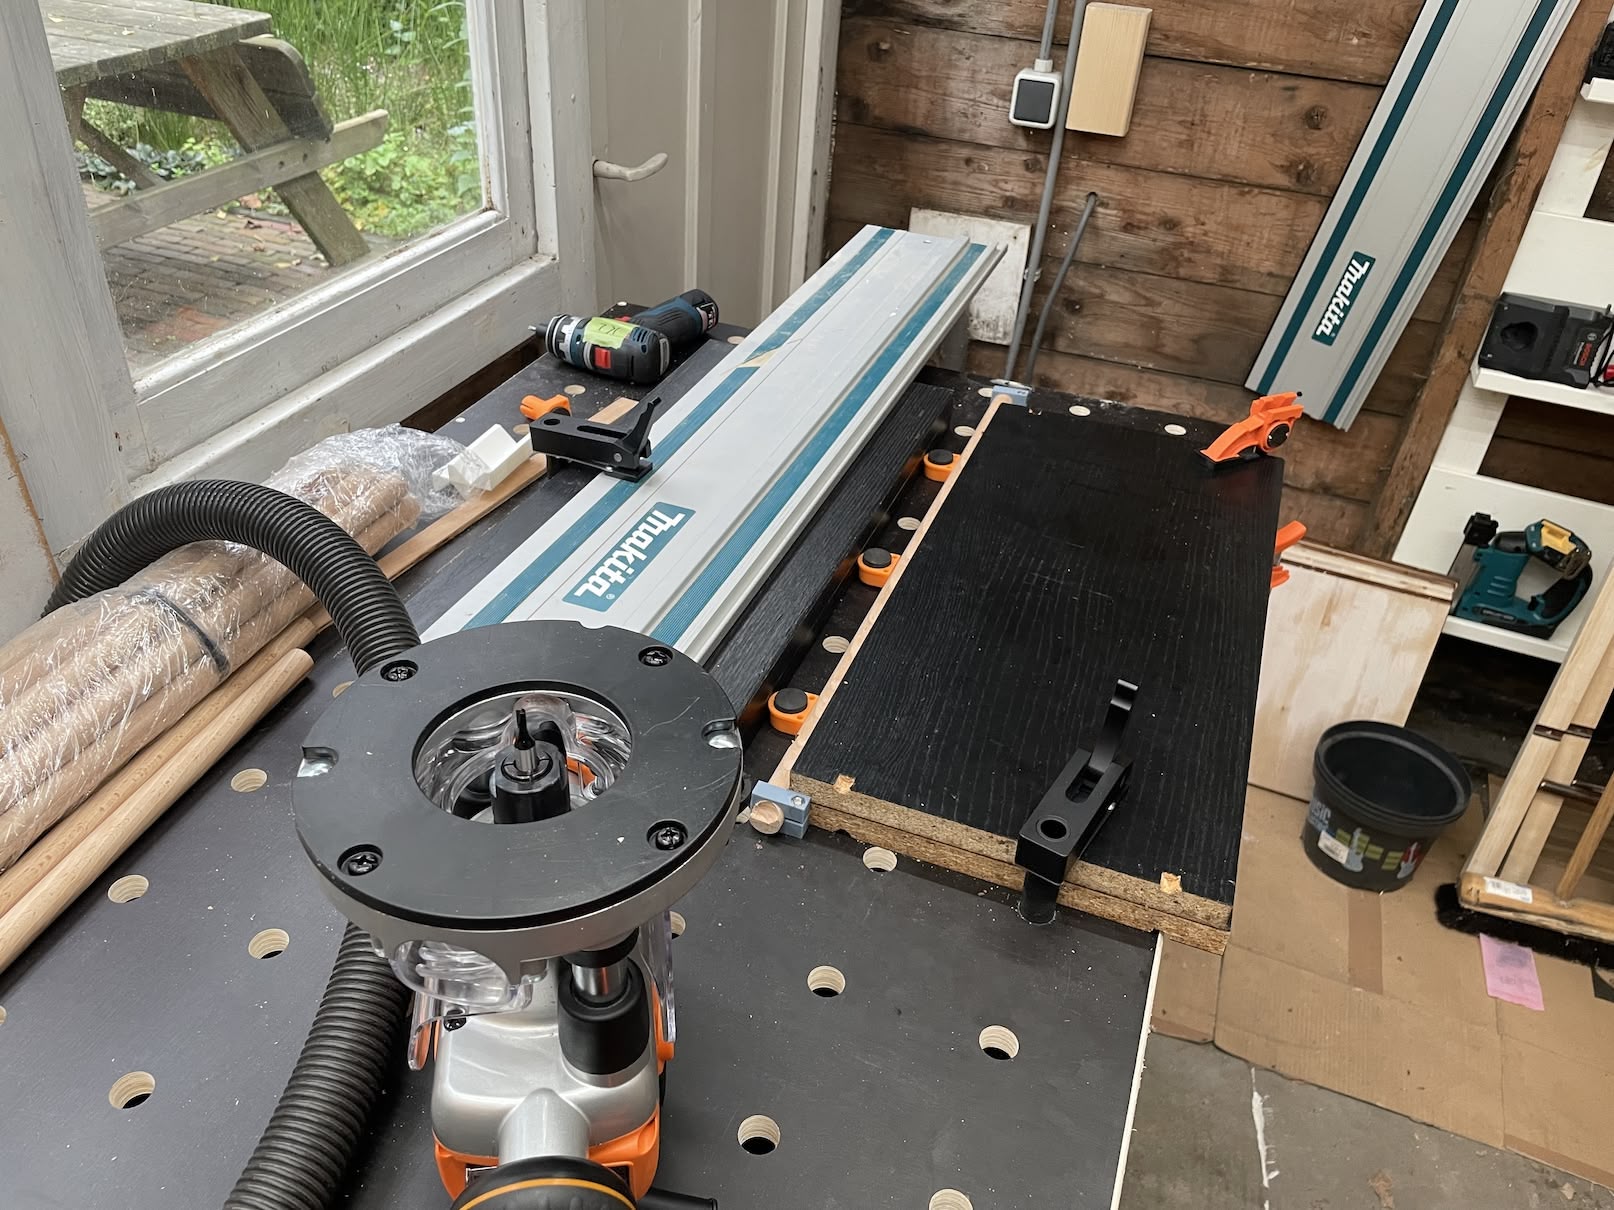
As it turns out, it takes a lot to hold round wood down securely to a table and route a groove exactly down the center. I eventually got there with enough scrap material, clamps, and track saw track as straight edge:
Since I was using decorative pan head screws, I needed both through holes (for the screw shafts) and counterbores (for the shiny heads) along the dowels. Free-handing with a drill worked about as well as you might expect — turns out it’s very obvious when a 15mm diameter counterbore isn’t exactly centered on a 20mm diameter dowel — so I ended up buying a benchtop drill press:
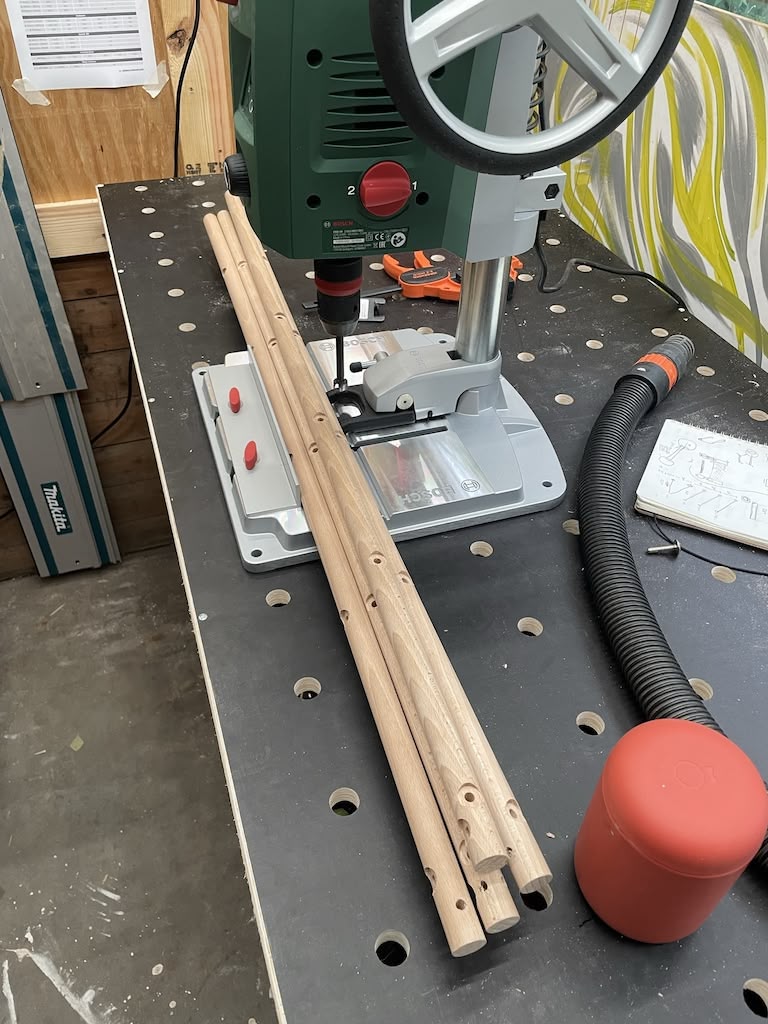
This Bosch PBD 40 has some awesome features like electronic speed control and digital depth readout. Unfortunately, it also came with noticeable wiggle in the chuck and about 1mm deviation between the base plate’s v-groove and the drill center, both of which make it impossible to throw material down and get a repeatable hole location — you have to carefully line everything up first.
As far as I can tell (please let me know if I’m wrong!) there’s not really anything better on the market until you’re willing to spend for the $1,400 Nova Viking benchtop drill press.
After much drilling, I decided there was absolutely no way I was going to enjoy building a shoe tower using dowels (much less an entire bedroom storage system), so I demoted this prototype down to “plant stand”, which ended up turning out OK:
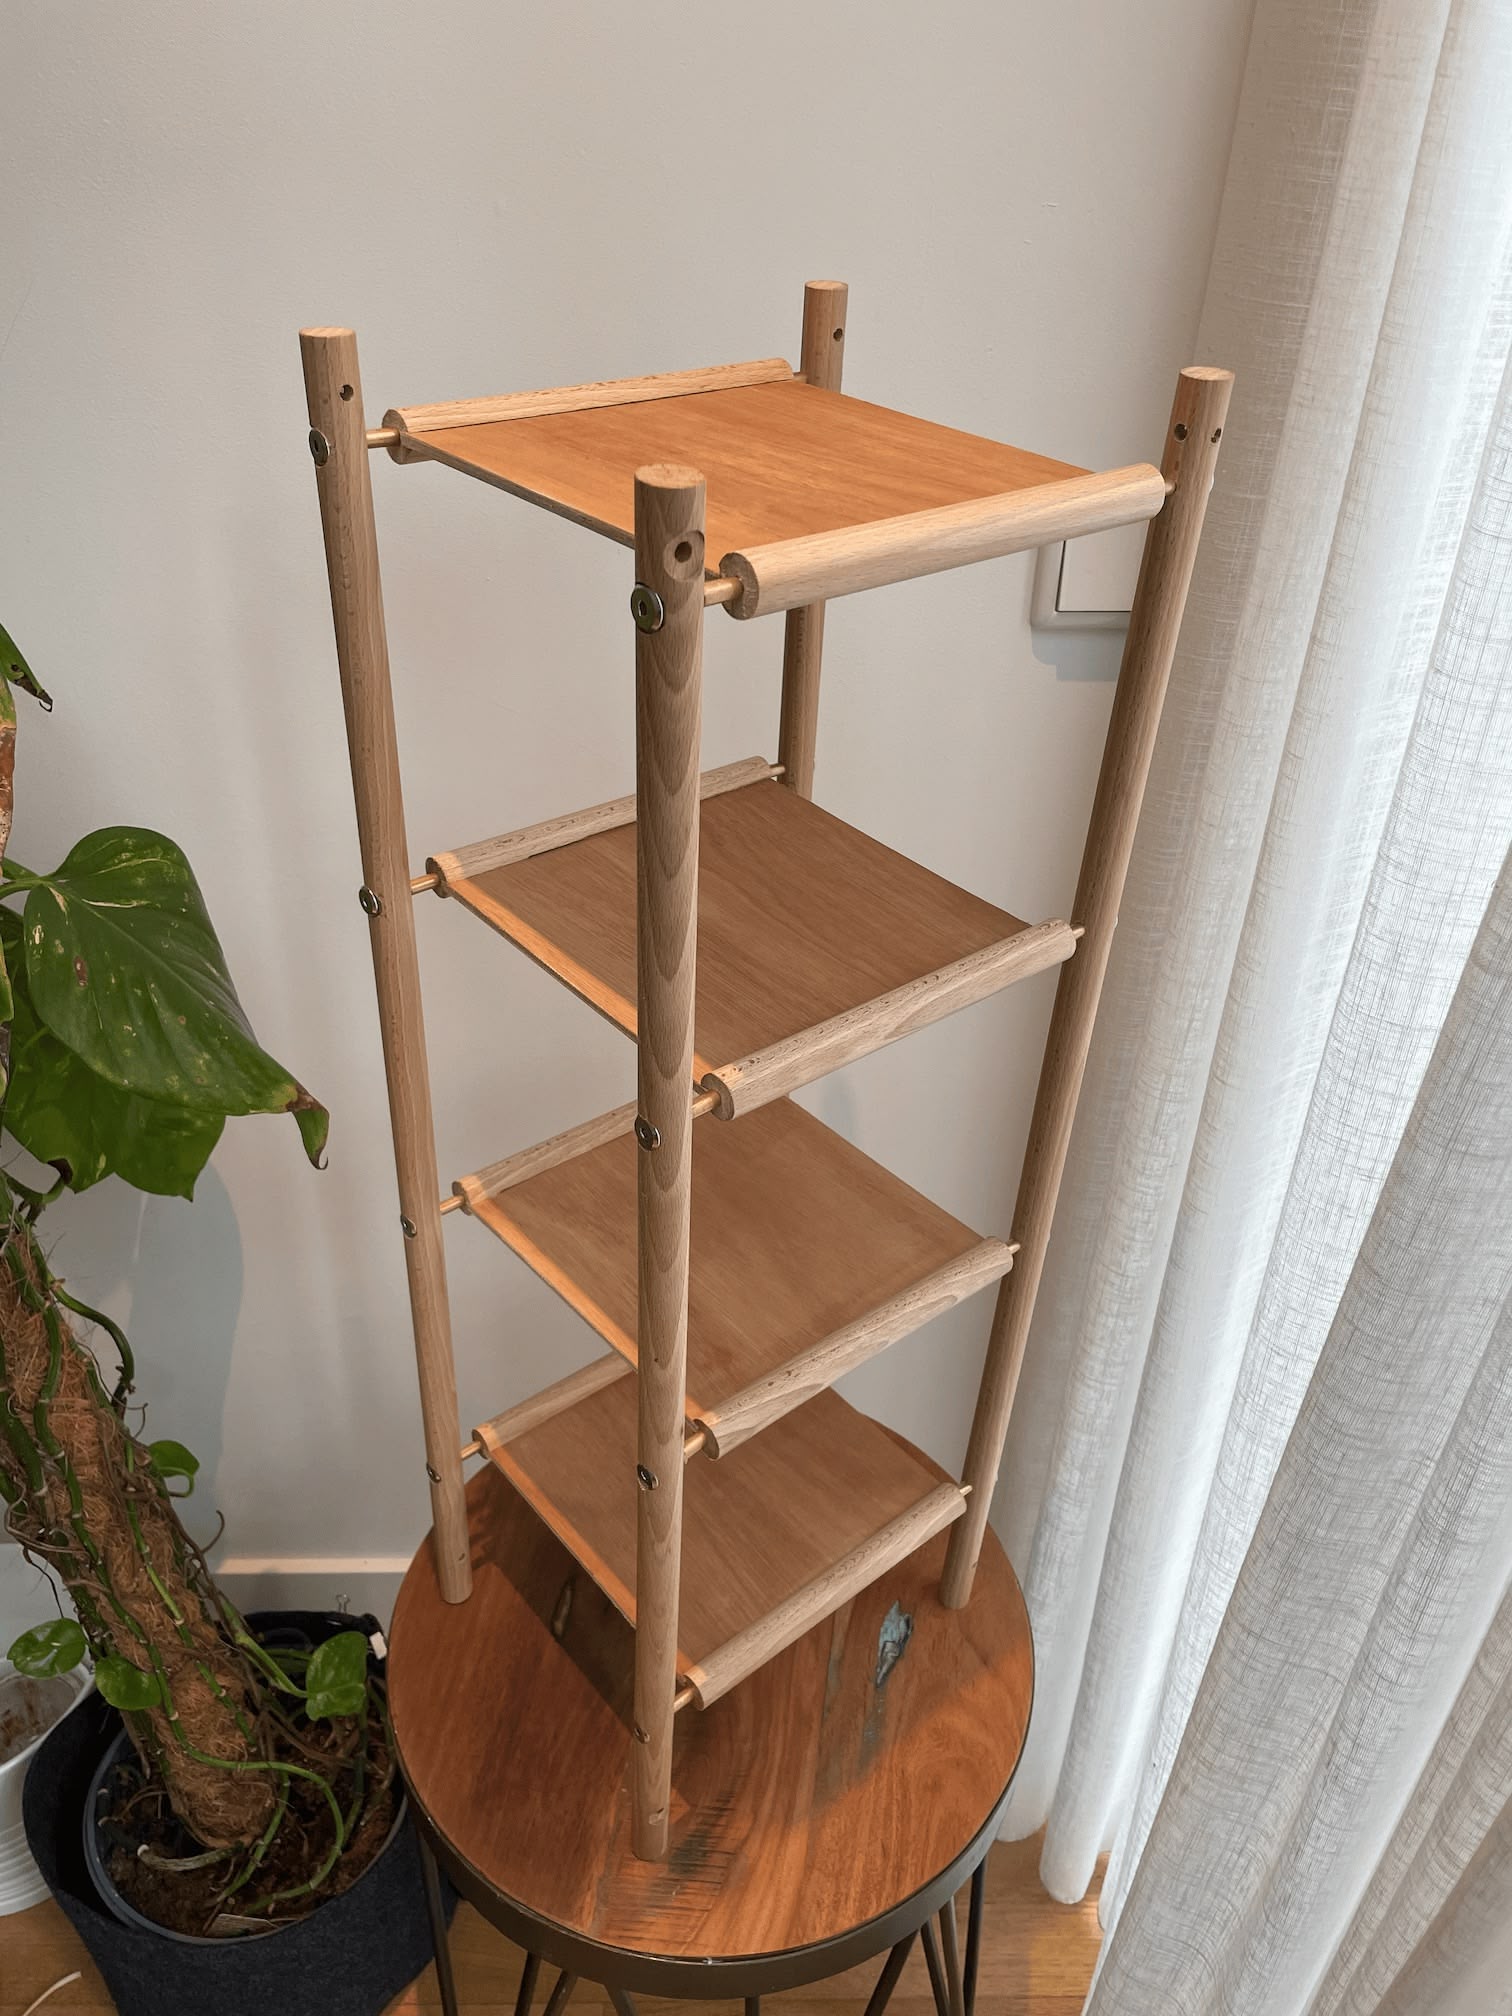
(Just ignore all those extra holes.)
I used brass tube to hide the screw threads. Originally I thought I’d be able to easily cut brass tube with a hacksaw — turns out absolutely not; brass is way too gummy and it’s impossible (for me, anyway) to maintain a consistent cut line by hand. Luckily, I found one of these $10 things which, pleasingly, is extremely good at its one job:
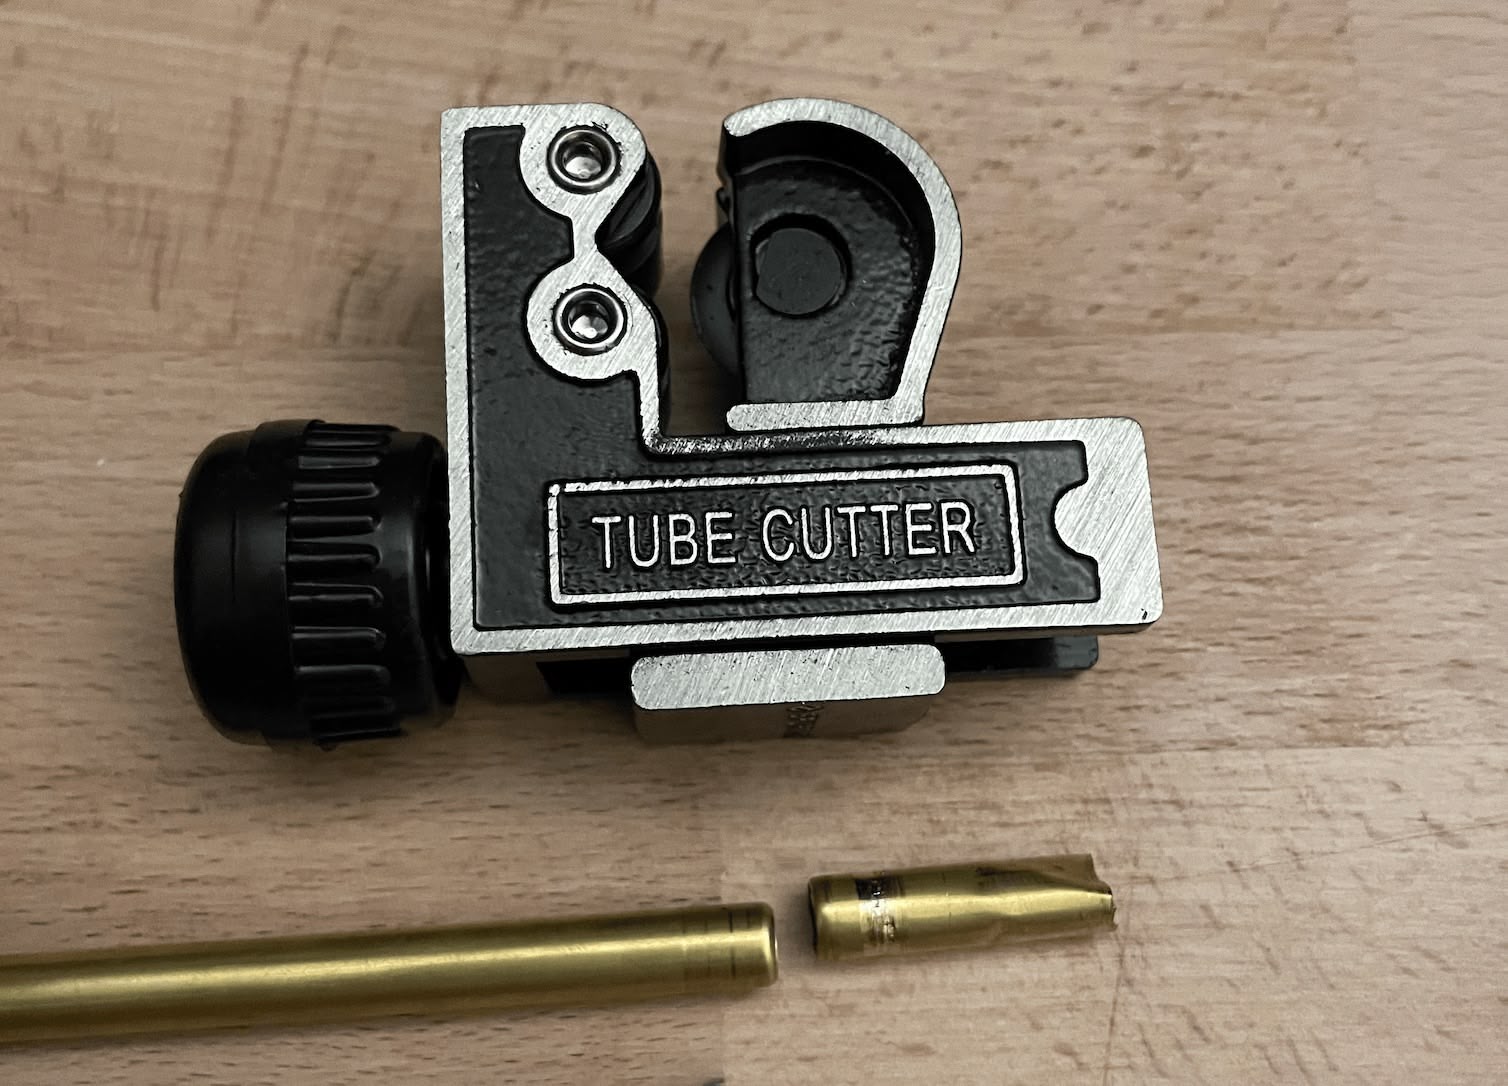
(Notice the the right side piece was crushed in a drill chuck and has an all-over-the-place failed cut from me earlier attempting to cut it by spinning it against a clamped-down hacksaw.)
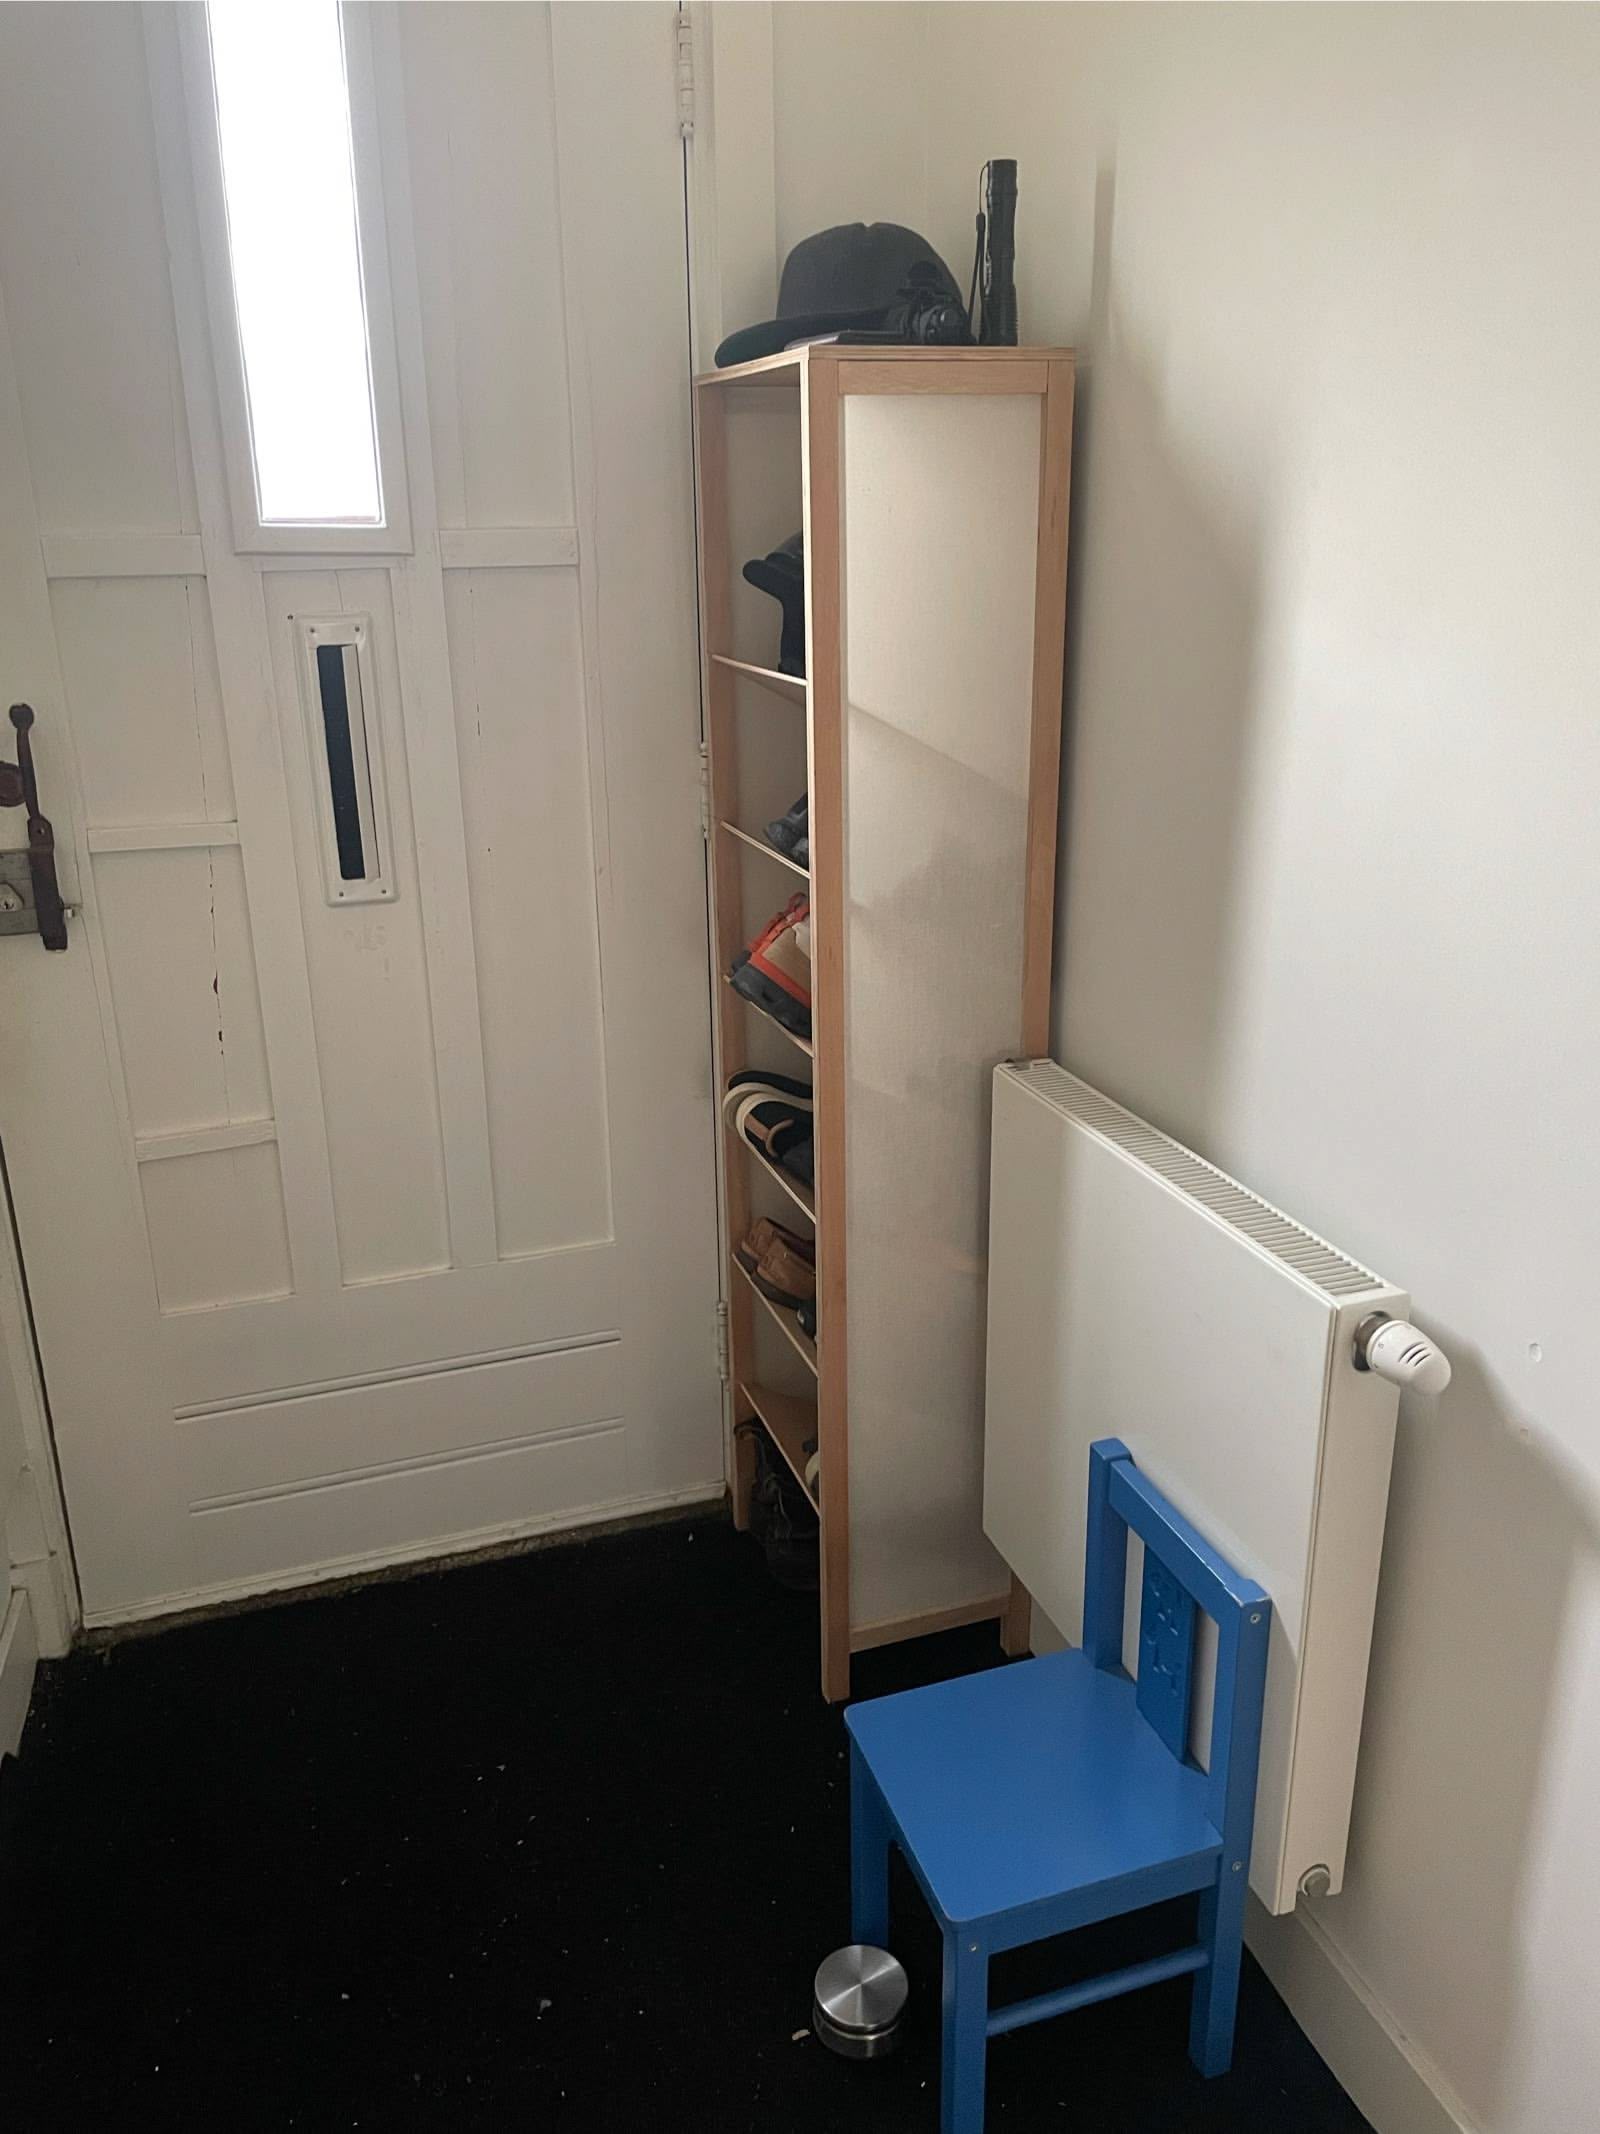
For my second shoe tower attempt, I wanted a lightweight plywood frame combined with fabric — something in the direction of Mieke Meijer’s Airframe cabinet (which looks cool as hell).
That build went much more smoothly, and the final product turned out better than I expected:
The only hiccup during the build was discovering that my dowel jig won’t work with material thinner than 15mm (my plywood was 12mm). I made a sort of jig/guide using my new drill press and a bit of scrap wood, but the final joints still turned out a bit wonky.
This is a typical woodworking experience for me — a seemingly simple task like “drill holes centered in a plywood edge” takes two hours longer than expected, and even then doesn’t come out quite right. ¯\_(ツ)_/¯
Have you tried rubbing some computer on it?
Back when I had a CNC router in my closet, I used to think it’d be so much faster to work in a more traditional workshop with proper saws and drill presses and stuff.
But now that I’m frustrated in my back garden shed, discovering that I’m missing the appropriate drill size / pattern bit / alignment jig and spending hours carefully drilling not-quite-centered holes, I’ve started daydreaming that, surely, a “conversational” CNC router workflow could be better: clamp stuff down to the machine bed, get a high resolution / magnified image of the work, and specify exactly where and what to cut by pointing at stuff in the computer.
Ideally you’d get an orthographic image — a top-down projection without any perspective distortion.
Since I’m not about to shell out a few grand for a telecentric lens, I started falling down a rabbit hole of building my own camera by using the machine gantry to move a large CCD line-sensor across the bed.
The TCD1304, for example, has 3648 pixels over a 29mm sensor line, runs about $10 on AliExpress, and is used by solid looking open-source hardware and firmware (they’re popular sensors for making your own spectrometer, apparently).
However, I realized that I know basically nothing about optics. Seeing the details of this gigapixel camera from flatbed scanner CCD disabused me of the notion that I’d have a snowball’s chance in hell of making a usable camera.
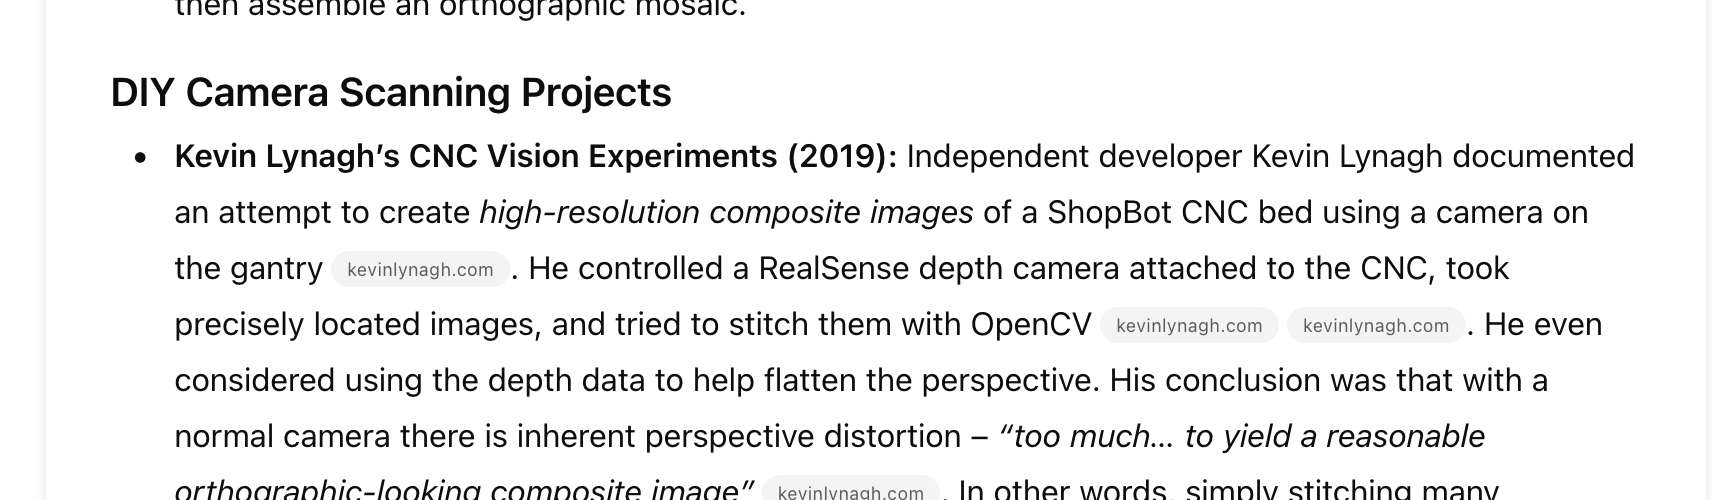
I spent some time with ChatGPT’s Deep Research exploring other ideas, but it didn’t come up with much besides reminding me that I’ve been spewing tokens on this bullshit for a while now:
Good ol’ YouTube came to the rescue, though — Paper Tools cleverly avoids the entire perspective distortion problem by only allowing you to pick coordinates from the center of the camera image.
I.e., rather than giving you a static orthographic image that you then CAD/CAM on top of, their workflow requires that you literally drive your CNC machine around to the exact point locations every time you select one.
Quite an obvious solution in hindsight, and I’m curious to watch how that project unfolds.
Next: Drawers
After a week of daydreaming about an alternative, fluid conversational CAD/CAM interfaces for the CNC router currently across the Atlantic Ocean from me, I came back to my senses and decided to keep prototyping furniture ideas sans computer.
I figured solid wood might be more satisfying than plywood. Of course, I don’t have a jointer, planer, nor experience working with actual hardwoods, but I do have some leftover 2x softwood I can start with.
My current idea is to lean heavily on bright colors — paint, 3d-printed plastic, and paracord.
I’m experimenting with cross-bracing using the latter two materials:
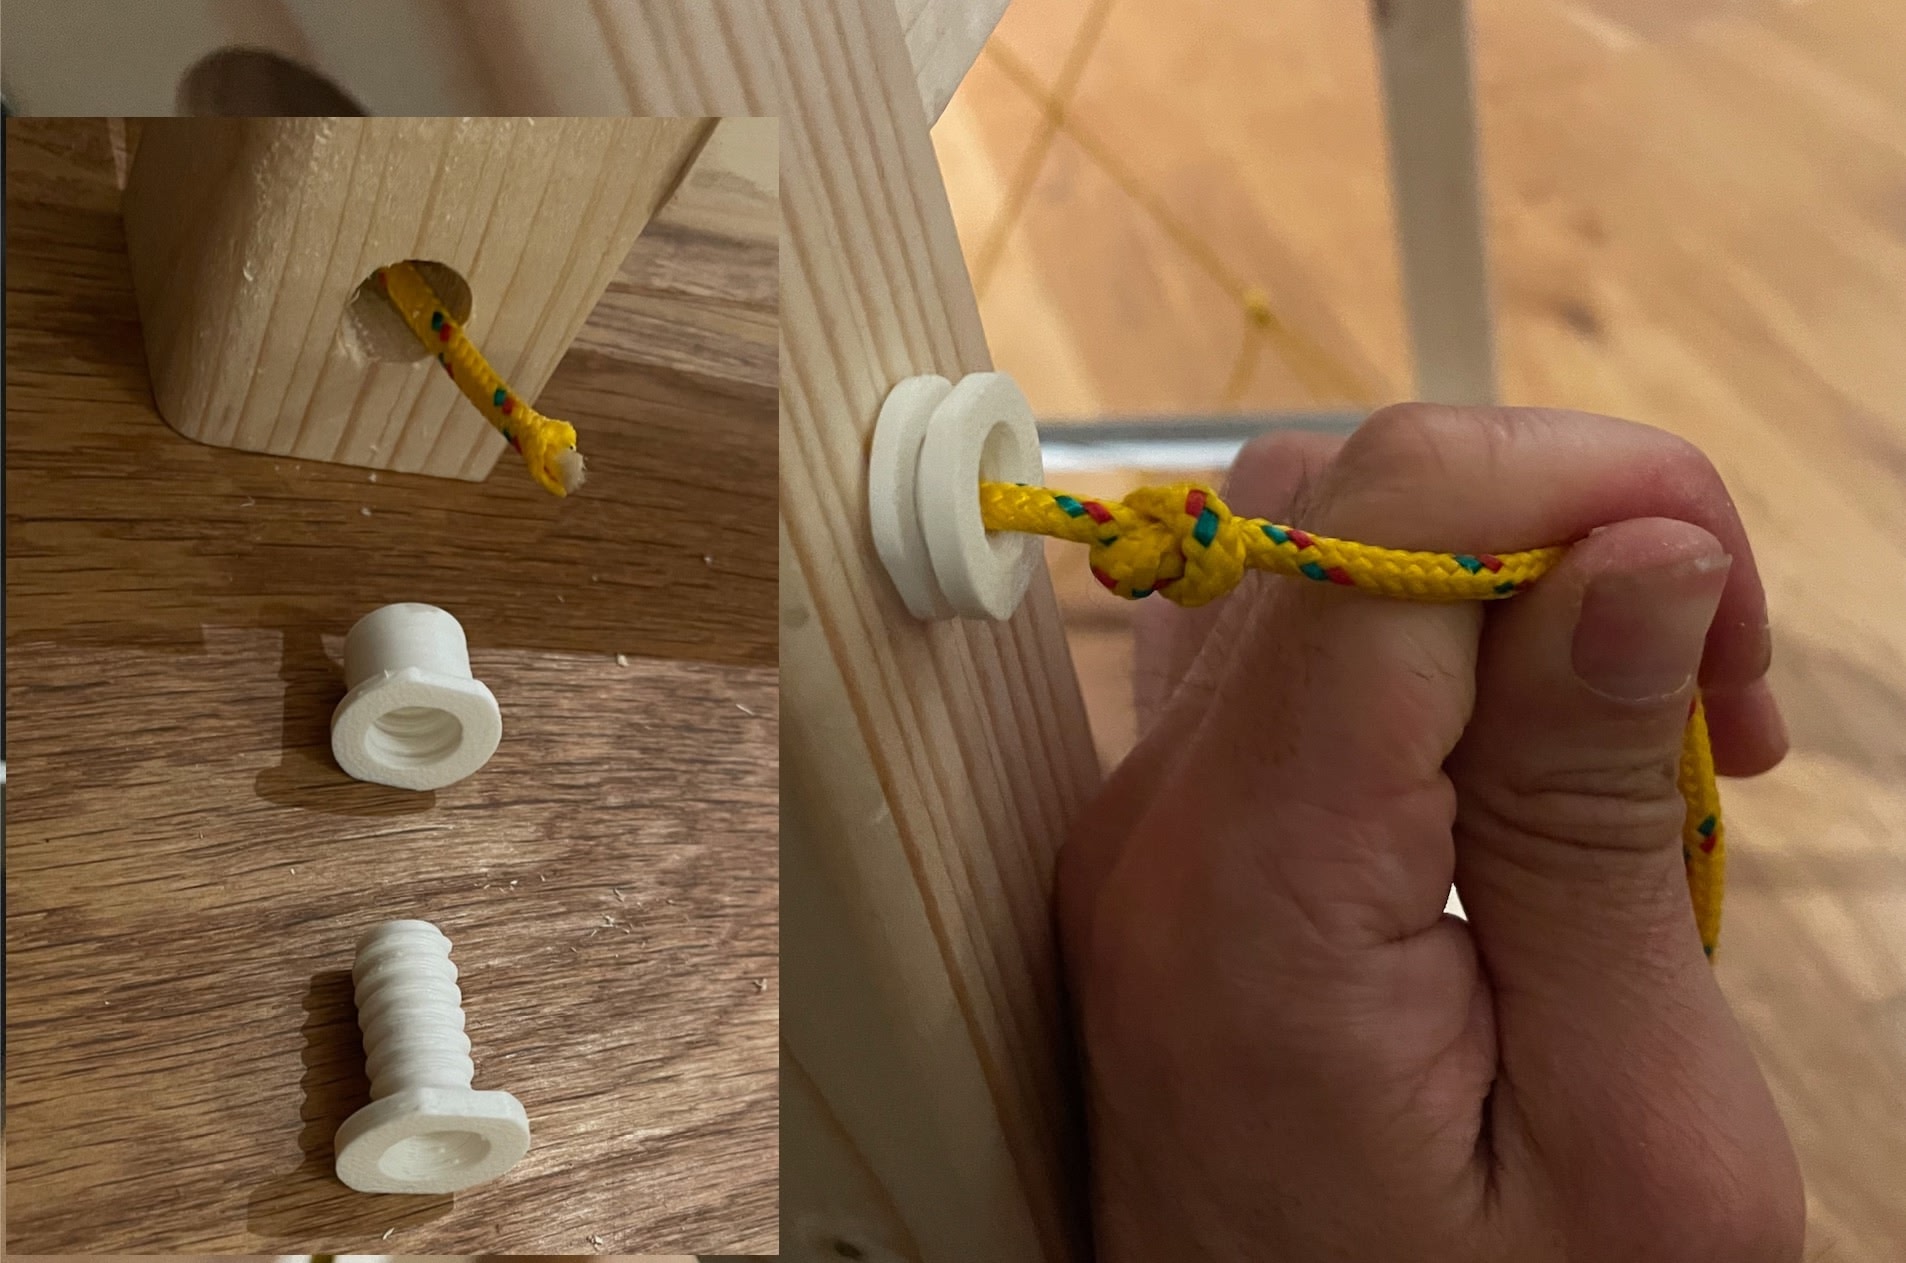
For the life of me I can’t find a stopper knot that I can slide or otherwise tie under tension — if you have any ideas or suggestions of how to get a tidy looking knot that’ll slide to the left, I’d love to hear them!
Misc. stuff
My powered air respirator now works great: I ended up going with a dual-fan design and dropped the belt clip in favor of an easier-to-don sling bag.
I love the engineering competence and details in this NTSB interview with a submersible expert. The names are all redacted, but you might be able to guess the interviewee from his first answer: “Well, I’m sure you’re familiar with my film Titanic”. I also particularly liked one of the safety discussions: “I think the most dangerous part of our whole operation was these young software engineers puking over the railing in a high sea.”
The Biochemical Beauty of Retatrutide: How GLP-1s Actually Work. I’ve never studied physiology, and this article was a perfect overview of one of the most exciting medical advances of the recent years. I was also delighted when the author connected biochemistry with familiar endurance running feelings.
Speaking of nicer visual / probing systems for CNCs, this now-on-Kickstarter Nestworks C500 has a bunch of nice looking quality of life details. I swear it was just yesterday I dropped $10k for a Shopbot Desktop with a sketchy USB connection. I’m so lucky to have such deflationary hobbies.
Your cheap furniture has a secret. A history of rubberwood.
I’m renting a place with gas cooktop, but I wanted induction so I bought the €40 Ikea single-burner and am extremely happy with it. Normally not a fan of touch controls, but it has extremely responsive ones. The protocol between the display and induction coil has also been reverse engineered in case you want to add your own control loop. (I don’t need another project, I don’t need another project..)
“They needed to connect the organ promptly to the patient manually, with a technique called anastomosis. The medical sutures of the time were too thick, and the needles too large, to avoid damaging delicate blood vessels. To overcome such challenges, the world needed a skilled seamstress.”
“Complexity is free in 3d printing, the limit of design geometry is mostly how much time you’re willing to spend in CAD. I wanted to print the most complicated art piece I could think of.”
I was curious how the support structures were generated, so I asked Claude to read the code and it gave me a great explanation for $0.04. What a world!
SpreadSheesh! by Dennis Heihoff - Clojure Electric-based spreadsheet with live code evaluation and custom UI rendering